How to Add ACF Filters to WordPress Feeds: A Step-by-Step Guide
Learn how to enhance your Query Loop Block by using custom Advanced Custom Fields (ACF) with the Filter Query Block Pro plugin. This plugin allows seamless integration of ACF fields for precise content filtering, perfect for sites looking to organize content dynamically.
Share
Step 1. Install and Activate Filter Query Block Pro
- Download and install Filter Query Block Pro from the plugin website.
- In your WordPress dashboard, go to Plugins > Add New, upload the plugin, and activate it.
Step 2. Add Filter Query Block Pro to Your Page/Post
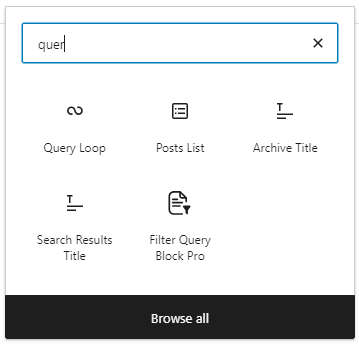
- In the Gutenberg editor, add the Filter Query Block Pro to the page or post where you want the filterable feed.
Step 3. Configure ACF Field Filters
- In the block settings, click Add Filter and select relevant ACF fields (e.g., location, topic, date).
- Choose display options like dropdowns or buttons.
Step 4. Customize the Query Loop Block Template
- Inside the Filter Query Block, there is a Query Loop Block as a child block.
- Customize the Query Loop to design how posts are displayed, such as showing titles, excerpts, or custom layouts.
- If you already have a Query Loop Block, you just drag it into the Filter Query Block.
Step 5. Preview and Test
- Use preview mode to check that filters and layouts work as expected.
- Adjust filter and styling options if needed for the best user experience.
Visit Filterqueryblock.com for more information.
Read more
Read how you can add filters by tags and categories and search to the Query Loop Block.
More tutorials
Top 10 Must Have Code Snippets to Supercharge Your WordPress Site
Ten essential code snippets that you can add to your functions.php file to enhance your WordPress site
Read more Top 10 Must Have Code Snippets to Supercharge Your WordPress Site
Understanding the WordPress Query Loop Block: What It Is and How to Use It
The Query Loop Block is a powerful feature in WordPress that allows users to display lists of posts or pages dynamically.
Read more Understanding the WordPress Query Loop Block: What It Is and How to Use It
How to use multiple post types in a Query Loop Block
Currently the Query Loop only supports one post type. In this article we will show how we add multiple post types to…
Read more How to use multiple post types in a Query Loop Block


